Looking For A Vsphere Client For Mac
Fusion 11.5 continues the journey we began over 11 years ago. This year we’ve added support for the latest Mac, Windows and Linux operating systems, a whole new look and feel with Dark Mode, improved performance and reliability, added new networking functions, patched critical security issues, and added more compatibility with vSphere. Vsphere client 6.5 download for free. System Utilities downloads - VMware vSphere Client by VMware, Inc. And many more programs are available for instant and free download.
Note: vSphere 6.7 Update 2 was recently announced and is generally available as an update and download.
The announcement of vSphere 6.7 Update 2 informed us of many new features like DRS-MM (DRS in Maintenance Mode), CPU scheduler options for vulnerabilities like L1TF, as well as new vSphere ROBO licensing, and updates to vSphere Platinum. While this release does include the usual bug fixes, it also focuses on improvements in several key areas. In this post, we’ll go over these key improvements and their importance as they pertain to vCenter Server. Let’s find out what’s new in vCenter Server 6.7 Update 2.
vCenter Server Architecture
Recently, VMware announced it would deprecate the external Platform Services Controller deployment model and in the next major vSphere release (not an update release), external deployments would not be an available option. To build on this change of deployment types as well as help alert customers, vCenter Server 6.7 Update 2 now includes warnings informing the vSphere Administrator of the deprecated deployment for the External Platform Services Controller.
Warnings are visible in the vCenter Server Appliance installer UI or CLI. Please see KB 60229 for more details.
Converge Tool
The Converge Tool was introduced in vSphere 6.7 Update 1 as the method to move from an external PSC deployment to an embedded PSC via the vCenter Server CLI. Today with vCenter Server 6.7 Update 2, convergence functionality is now available within the vSphere Client. Included is a Table View or Topology View of all vCenter Servers and PSCs. Easily identify replication partners or log in to the vCenter Server Appliance Management Interface (VAMI) interface directly. Table View is the starting point for converging an external PSC to embedded, with a simplistic overview of all vCenter Server nodes.
Simply select the vCenter Server that is registered to an external PSC, then choose Converge To Embedded to begin consolidating. At a high level, convergence begins, the required RPMs for PSC services are installed on the vCenter Server, and replication agreements are configured. The external PSC can then be decommissioned after all vCenter Servers in the SSO domain have been completed. Select the PSC to decommission and click Decommission PSC to unregister the external node from its vCenter Server. The decommission process also powers off the PSC.
NOTE: Be sure to repoint any other VMware or 3rd party software from the external PSC to the new embedded PSC node prior to decommissioning the external PSC.
File-Based Backup and Restore
vCenter Server 6.7 Update 2 includes new protocol support for backing up and restoring a vCenter Server Appliance. Introducing Network File System (NFS) & Samba (SMB) as the newest supported protocols for the built-in File-Based Backup and Restore. The addition of NFS and SMB now brings the protocol choices up to 7 total (HTTP, HTTPS, FTP, FTPS, SCP, NFS, and SMB) when configuring a vCenter Server for File-Based Backup or Restore. Currently supported versions of these new protocols are, NFSv3 and SMB2.
Backing up vCenter Server is an important task that tends to fall within Day 2 operations. The vCenter Server Appliance supports both Image-Level as well as File-Based backups. Many customers today leverage image-level backups just like they do for other virtual machines (VM) within vSphere. Leveraging the built-in File-Based backup is the best way to back up your vCenter Server. When an Image-Level backup is used in conjunction with a File-Based backup, you now have peace of mind that if an issue arises with a backup, your vCenter Server data can be recovered. Utilizing both methods will act as your insurance policy for backups.
NOTE: These features are only available for the vCenter Server Appliance.
Another improvement to File-Based Backup is the introduction of Event Notifications for backup & restore. vSphere 6.7 Update 2 now contains Alarms such as Backup Job Status, as well as Success and Failure events. Now easily identify success or failures of File-Based backups in vCenter Server.
File-Based backup alarms are of course customizable to fit needs. In this example we see from Alarm Definitions window, we can search for the alarm, edit and customize as needed. Options for email notifications or SNMP traps can also be configured here.
vSphere Health
When vSphere 6.7 became generally available in April of 2018, it included a powerful new feature, vSphere Health. vSphere Health works to identify and resolve potential issues within a customer’s environment. Telemetry data is collected analyzed from the vSphere environment and used to guide the vSphere Administrator through remediation.
Discover more about vSphere Health: Understanding vSphere Health & Tech Field Day 18
New to vSphere Health in this update release is Categories and Alarms. Alarms are generated when a new issue is detected in vSphere. vSphere Health alarms can be set to Acknowledge or Reset to Green much like other vCenter Server alarms.
ASM1042A is highly integrated with ASMedia PCI Express, SuperSpeed USB and USB2.0 self-design PHYs. ASMedia Technology Inc. 祥碩科技.ASM1042A♦ General DescriptionThe ASM1042A is ASMedia’s new generation of Universal Serial Bus 3.0 extended host controller, bridging PCI Express to two ports of USB3.0, ASM1042A is designed for high speed, low power data transmit, backward compatible with current USB2.0 standard and complies with Intel’s eXtensible Host Controller Interface (xHCI) Revision1.0.The ASM1042A supports UASP (USB Attach SCSI Protocol) and Debugport function, It is certified for Win8 WHCK and is supported by Linux and MAC OS platforms. Asmedia asm1061 drivers for mac.
Health checks are now grouped into one of four health Categories; Online Availability, Compute, Network, and Storage. This new grouping feature not only allows for a simple, organized view of all vSphere Health checks but also aligns with the goal of improving the overall organization of vSphere Health as more health checks are introduced.
Content Library
The addition of storing Virtual Machine Template (VMTX) files in Content Library was introduced in vSphere 6.7 Update 1. This enables deploying a virtual machine from native VM templates alongside OVF/OVA templates within Content Library.
vCenter Server 6.7 Update 2 continues to add new functionally when utilizing Content Library. Syncing of native VM templates between Content Libraries is now available when vCenter Server is configured for Enhanced Linked Mode. Published libraries can now become subscriber aware allowing newly published items to replicate to other subscribed Content Libraries.
A Publish option is available when viewing the VMTX template or from the Subscriptions tab of the local library. Publishing from the local library will sync the VM template to the selected Subscriber Libraries.
One of the biggest use cases for Content Library is the ability to distribute VM content across vCenter Servers in order to avoid recreating VM template configurations from scratch. Content Library Sync addresses this concern allowing the distribution of VMTX templates between vCenter Servers.
vSphere Client
Let’s not forget the vSphere Client. In what started out as a VMware Fling, the vSphere Client has become our default client when using vSphere. vSphere 6.7 Update 2 brings a few additional enhancements to this HTML5 based client.
New to the vSphere Client is Developer Center with Code Capture and API Explorer. While this popular feature started out in the vSphere HTML5 Web Client Fling, it is now available in vSphere 6.7 Update 2. Code Capture allows you to record your actions in the vSphere Client delivering simple, usable code output. Senior Technical Marketing Architect, Kyle Ruddy says it all in a recent post; “If you’ve ever wanted to see how tasks performed in the UI would look as code, this is it.”
Learn more about Code Capture:Introducing Code Capture
Once enabled, Code Capture can easily be activated via the “record” button in the vSphere Client.
Next is API Explorer. If you are familiar with using APIs in vSphere you probably remember API Explorer located here; https://<vCenterServer-FQDN>/apiexplorer since the vSphere 6.5 release. This update brings API Explorer into the vSphere Client which removes the extra steps authenticating prior to interacting with the REST APIs. Quickly search certain services and methods available in the vSphere REST API by specific words. For example, searching the term “back” filters APIs to show relevant results.
An Execute button now appears the bottom of each method’s section allowing quick access to perform the action via the REST API. Fair warning that this is a LIVE CHANGE, pop warnings are also shown when trying these actions.
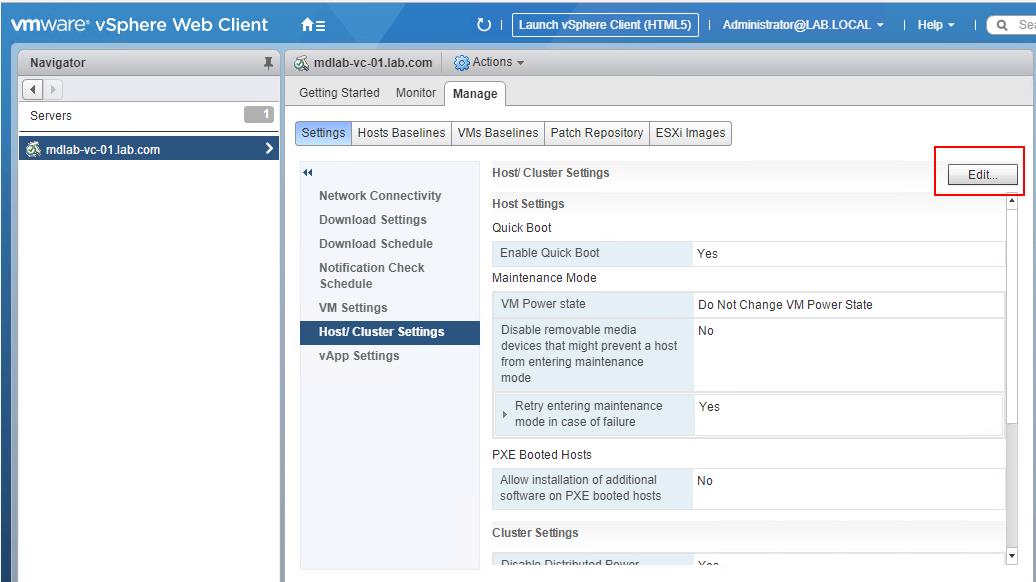
vSphere Update Manager (VUM) adds enhancements also to the vSphere Client. Now perform Attach, Check Compliance, and Remediate actions all from one screen. Remediation workflow updates include attaching and remediating multiple baselines, disconnecting removable devices, and enabling Quick Boot. Viewing the details of an ESXi Image within vSphere Update Manager has also evolved. Easily discover the Name, Version, Vendor, Acceptance Level, etc. for all packages included in the selected image.
vSphere Plugins
The Client Plug-Ins page has been given an update as well in vSphere 6.7 Update 2. In previous vSphere versions, troubleshooting client plug-in issues meant sifting through logs to find out what went wrong. Now easily view the Deployment state of a plug-in right from the vSphere Client. vSphere Plug-Ins that have failed to deploy to the vSphere Client or are incompatible will be shown on the Client Plug-Ins screen. Access this interface by selecting Administration from the Menu, then select Client Plug-Ins under Solutions.
The vSphere Task Console will now also show the status of each plug-in as it registers with vCenter Server. If a plug-in download or deployment failure occurs, more details can be found by selecting the task and reviewing the error stack. The Task Console is found from the vSphere Client Menu under Tasks.
Conclusion
In closing, we see that vSphere 6.7 Update 2 is bringing plenty of new enhancements for vCenter Server. Stay tuned for future posts and walkthroughs that go into more detail for new vCenter Server6.7 Update 2 features. If you have any questions please post in the comments section below!
Installing VMware ESXi on a laptop might seem like an insane thing to do, but it's usefull for testing and demonstration purposes. And this guide will show you how to install it on a MacBook Pro.
Hardware requirements
The instructions coming up, should work on most modern Mac systems with a CPU that has hardware assisted virtualization. The steps that follow have been tested on a MacBook Pro (13-inch, 2017, 16 GB RAM running Mojave).
The reason why you need a CPU with hardware assisted virtualization, is because we’ll be usingVMware Fusion* to run nested virtualization on a Mac.
Why VMware Fusion?
VMware Fusion allows you to pass the hardware assisted virtualization feature of the CPU to a running virtual machine. This is required when running hypervisors like ESXi or KVM inside a VM.
So for this tutorial we’ll be usingVMware Fusion 11.5 (Standard)*.
Download VMware vSphere ESXi 6.7 ISO
Head over to the VMware vSphere ESXi 6.7 download page and click the Download Now button to get the ISO.
Note:VMware ESXi is free when using only the basic features, and when you first install it, you get to try all the advanced features for 60 days.
Creating a VMware vSphere ESXi 6.7 virtual machine with VMware Fusion
OpenVMware Fusion* and then click on the + icon in the toolbar.
Click New…
Select Create a custom virtual machine and then click Continue.
Select VMware ESX then VMware ESXi 6.x and then Continue.
Leave the firmware type as UEFI and then click Continue.
Click Continue to create a 40 GB virtual disk.
Click the Customize Settings button so that we can attach the ISO.
You will be asked to save the virtual machine. Give it a name and then click Save.
Once the VM is saved, the settings screen will load. Click on CD/DVD (IDE).
Click on the dropdown and select the Choose a disc or disc image… option.
Browse to the VMware ESXi ISO that you downloaded and then click Open.
Tick the Connect CD/DVD Drive option and then close the settings window.
We are now ready to install VMWare ESXi on the virtual machine.
Installing VMware vSphere ESXi 6.7 on a VMware Fusion virtual machine
Click the play icon to start the ESXi virtual machine we created in the previous step and wait for the VMware ESXi hypervisor to load.
Press Enter at the welcome screen.
Press F11 to accept the EULA and continue the installation. You might not be able to use the FN key to get F11 inside a virtual machine on the Mac.
You can send F11 to the virtual machine by clicking Virtual Machine, Send Key and then clicking on F11.
Tip:You can remove the keyboard focus from the virtual machine by pressing Control + Command on a Mac.
Choose the disk you want to install ESXi on and then press Enter.
Select your keyboard layout and then press Enter.
Enter a password for the root user and then press Enter.
Send the F11 key to the virtual machine again to confirm and finish the installation.
Press Enter to reboot the virtual machine and load ESi for the first time.
ESXi 6.7 should now be installed and ready to configure.
Configuring the ESXi management network
As you can see from the image in the previous step, the management IP address of my ESXi host is 0.0.0.0. This is because I have the network adapter connected to a VMware Fusion network that has DHCP disabled.
If your host doesn’t have an IP, you’ll need to configure it using the steps coming up. If you do have an IP that was assigned via DHCP, I’d suggest you change it to a static IP so that you know it won’t change when the host reboots.
To configure the network press F2 and then login with your root password.
Select Configure Management Network and then press Enter.
Select IPv4 Configuration and then press Enter.
Change the IP type to static by highlighting the Set static IPv4 address and network configuration and then pressing Space.

Type in the IP address, subnet mask and default gateway then press Enter.
Tip:You can find out the gateway by running ifconfig at the terminal and by adding 1 to the inet address of the vmnet8 interface. For example, mine is 10.1.1.1 so the gateway is 10.1.1.2. If you’re using DHCP, you can find out what part of the range you can use for static IP addresses in this tutorial.
You may notice my network address is different to yours. That’s because I’ve changed it and disabled DHCP by editing the /Library/Preferences/VMware Fusion/networking config file and restarting VMware Fusion.
Select the DNS Configuration and then press Enter.
Select Use the following DNS server addresses and hostname by pressing Space. Type in the gateway IP in the Primary DNS Server box and the name of the host in the hostname box and then press Enter.
Press ESC to exit the network configuration screen. You’ll then be asked to confirm the changes by pressing Y.
Press ESC again to exit settings and you should now see the IP address we can use to manage the host.
We can test the connection from the host to the ESXi virtual machine works by typing the address in a web browser.
Final thoughts
VMware Fusion* is a powerful piece of software that lets you do more with your Mac by giving you the ability to run multiple kinds of operating systems like Windows, Linux and even ESXi as demonstrated in this guide.
We showed how easy it was to create a VMware vSphere ESXi virtual machine and have the OS installed in very little time.
It’s easy to get going with the basics of ESXi because its quite intuitive, however there are some really powerful features and advanced concepts that you can learn by readingMastering VMware vSphere 6.7*Mastering VMware vSphere 6.7*
What the * means above
Links marked with * are affiliated and can earn us a small commission at no additional cost to you, should you click through and make a purchase.For more details, read How This Site Is Financed.